
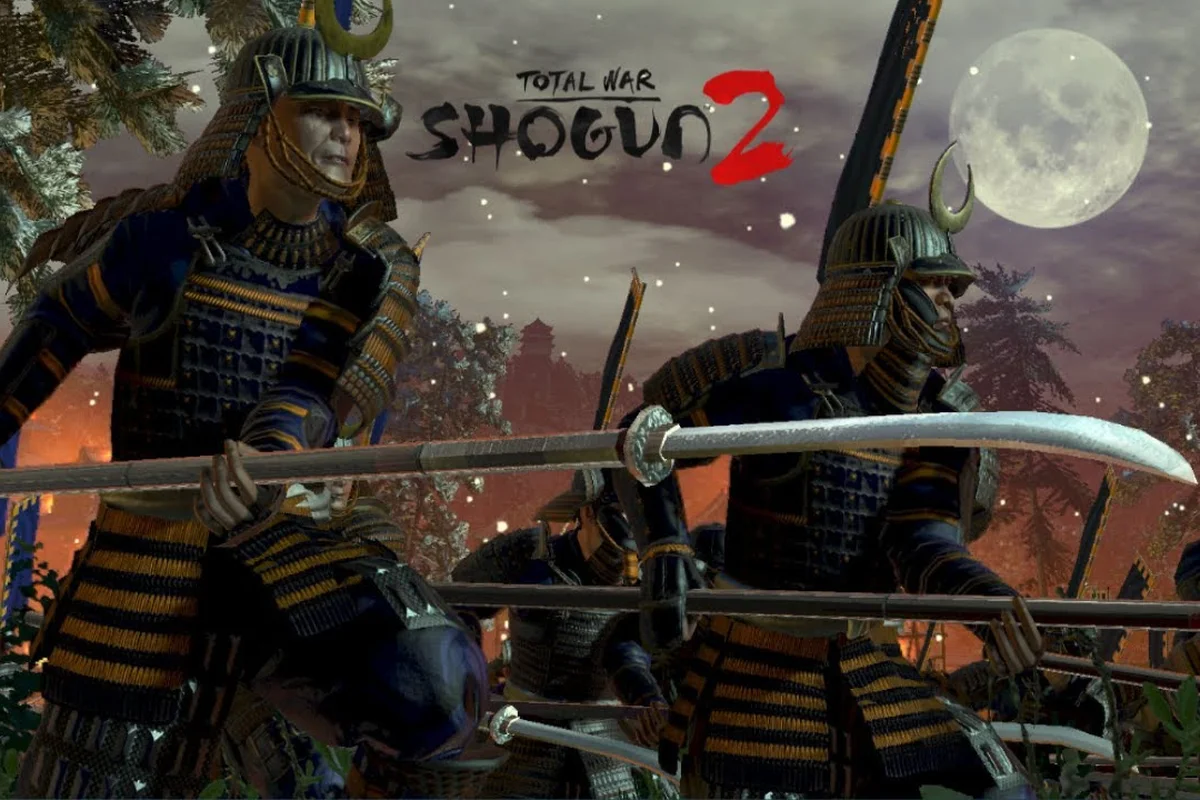
A clean envelopment is the single biggest swing factor between a winning line and a rout in Total War: SHOGUN 2, and this flanking guide shows exactly how to set one up with cavalry, archers, and terrain. The trick is treating flanking as a three-part system: a static or slow anchor to pin the enemy, a hidden striking arm to roll the flank, and a piece of ground that turns the contact into a rout. Master those three pieces and even Legendary battles stop feeling like coin flips.
The reason a flank works at all in this game comes down to the morale system, which the Shogun 2 morale break guide unpacks in detail: units that are hit in the side or rear shatter far faster than units taking the same damage to the front. A yari ashigaru block will hold a frontal charge from light cavalry for thirty seconds, but the same block collapses in roughly five seconds once cavalry punch through the corner. The flanking guide below breaks down each piece of the system, then puts them together into repeatable battle plans you can run on day one.
Shogun 2 Flanking Guide: Core Principles of the Envelopment
Every successful flank in Shogun 2 follows the same three-part pattern: pin, strike, exploit. The pinning force is usually a yari wall or a defensive spear line. The striking arm is almost always cavalry, and the exploit phase is a missile volley poured into the broken unit. Skipping any of the three reduces the battle to a straight-up grind, and a straight-up grind in this game favors the army with the deeper recruitment pool and the more expensive units.
| Phase | What It Does | Typical Units | What Goes Wrong If You Skip It |
|---|---|---|---|
| Pin | Holds the enemy line in place | Yari ashigaru, yari samurai, spear monks | Enemy rotates to face your striker before impact |
| Strike | Rolls the flank with melee mass and shock | Katana cavalry, naginata cavalry, light horse | No shock bonus, frontal grind, higher casualties |
| Exploit | Pours damage into the breaking unit | Bow samurai, yumi ashigaru, fire arrow units | Broken unit rallies and re-engages the pin |
The pin is non-negotiable. Without a unit physically holding the enemy's attention, a flanking cavalry charge becomes a chase, and cavalry chasing a retreating enemy line is exactly the kind of "win the battle, lose the army" situation that ends campaigns on Legendary. A yari ashigaru line in Loose Formation, backed up by a second line in the same stance, gives the cavalry enough time to traverse the rear arc without being intercepted.
Why the Side and Rear Multipliers Matter
Unit melee defense and armor values only apply to attacks coming from the front, which is one of the core armor-vs-melee mechanics discussed in the Shogun 2 armor vs melee defence breakdown. A katana cavalry charge into a yari ashigaru block from the side typically removes 40 to 60 percent of the unit's effective health in the first four seconds, and any unit taking flank damage also takes a morale penalty that scales with how much damage was dealt. A clean flanking charge is therefore both a health deletion and a morale deletion in a single motion.
The reverse is also true: if your own units get flanked, the same multipliers work against you. The most common mistake newer players make is committing their entire battle line forward, leaving a six-wide gap at one edge that enemy katana cavalry will find on their own in roughly forty seconds. Closing those gaps and pre-rotating the line to face a known cavalry approach is cheaper than rebuilding a unit that just broke.
Shogun 2 Cavalry Charge Tactics: Building the Striking Arm
Cavalry in SHOGUN 2 is the highest shock-damage-per-second unit class in the game, and the way you start the charge is what determines whether you get the bonus or trade blows. According to the original Shogun 2 Steam store page, the game has held a Very Positive rating from around sixty-eight thousand reviews, and the most common thread in those reviews is that cavalry micro, not raw unit count, decides field battles.
The charge bonus in this game is a hidden multiplier that scales with the distance the unit traveled and the time it spent in a "ready to charge" state, so a katana cavalry unit that walks into contact loses almost all of it. Two practical rules cover most situations:
-
Always attack-move from at least forty unit lengths away. A standing start caps the bonus at roughly the same damage as a normal melee cycle. A running start from forty-plus lengths stacks the bonus high enough to one-shot most yari ashigaru on contact.
-
Approach at an angle, never straight in. A straight-in frontal charge into a braced yari wall does almost no damage and tends to bounce. A forty-five-degree angle that hits the corner of a unit box converts that same charge into a full envelopment.
| Cavalry Type | Best Use Case | Charge Damage Tier | When to Avoid |
|---|---|---|---|
| Katana Cavalry | Pure flanking shock | Top tier, deletes infantry in 2-3 seconds | Holding a line, spear walls, prolonged melee |
| Naginata Cavalry | Anti-cavalry counter-charge | Mid tier, sacrifices charge for melee defense | Open-field hammer against braced spears |
| Yari Cavalry | Mobile yari screen | Low tier, mostly defensive | Hammer role, breakthrough charges |
| Light Horse (Bow) | Skirmish and routing pursuit | Very low melee | Hammer role, melee duels |
The light horse bow units are worth flagging because they are a different tool entirely. They are not a hammer; they are a scalpel. You use them to snipe exposed archers, bait enemy cavalry into bad charges, and run down routing units. Pushing them into a frontal melee cycle is the most common way experienced players accidentally delete a unit from their own army.
Pre-Loading the Charge Path
The biggest difference between a competent flank and a battle-winning one is what you did in the thirty seconds before contact. That means clearing the path of loose infantry, putting a screen between the striker and any enemy missile units, and giving the cavalry a clear arc to build speed. A cavalry unit that has to weave through friendly yari ashigaru in close formation will arrive at the flank at walking pace, and a walking cavalry unit deals roughly the same damage as a marching yari ashigaru.
A clean way to handle the pre-load is to pull two yari ashigaru units into a checkerboard formation at the line's edge, so the cavalry can pass through the gaps without braking. This is also where melee-vs-ranged positioning matters, since the yari blocks are doubling as the pin and the screen. A flat single-line formation blocks cavalry routing almost as badly as it blocks enemy charges.
Shogun 2 Hammer and Anvil: Putting the Three-Part System Together
The hammer and anvil pattern is the named version of the pin-strike-exploit system, and it is the cleanest way to teach it because the two named pieces map directly onto the two unit roles. The anvil is the slow, defensive, unbreakable piece; the hammer is the fast, shock, decisive piece. The anvil does not have to win the fight on its own, and the hammer does not have to hold ground. They only have to do their specific job, and the enemy line collapses because it had to deal with both at once.
In practice, the anvil is a yari ashigaru block in defensive close formation, often with a general attached. A general's aura adds roughly ten percent melee defense and a small morale bonus, which is enough to keep the anvil from buckling under the first wave. The hammer is a katana cavalry unit that starts behind the line, swings around the edge or through a gap, and hits the corner of the engaged enemy unit. The exploit phase is bow samurai or yumi ashigaru firing at the breaking unit while the cavalry is still in melee, because the breaking unit's morale damage continues to stack even while it is fighting.
| Component | Role | Recommended Unit | Position Before Contact |
|---|---|---|---|
| Anvil | Pin and absorb the charge | Yari ashigaru (defensive), Yari samurai | Frontal line, close formation, general attached |
| Hammer | Strike the flank | Katana cavalry | Behind the line, 40+ unit lengths back |
| Exploit | Pour missile damage into the break | Bow samurai, yumi ashigaru | On a slight rise, behind the anvil, clear LoS |
| Reserve | Plug gaps, counter enemy flanking | Mixed yari or naginata | Center-rear, ready to redeploy |
The "reserve" row is what most guides skip, and it is what most Legendary losses come down to. As soon as the enemy general sees his line being flanked, he will try to flank your hammer in return, and the only way to stop that is a reserve unit already in position. A single naginata samurai unit parked in the center-rear is enough to delete an enemy flanking attempt in two swings.
Common Hammer-and-Anvil Failures
The most common failure is using the wrong anvil. Yari samurai with high melee defense can hold a line forever, but they are expensive and they pin for so long that the hammer has time to overextend. Yari ashigaru pin for about as long as you need, they cost a fraction of the upkeep, and the small morale break that comes when the anvil finally gives way is actually a feature: it pulls the enemy unit forward, exposing its flank to a second hammer run.
The second most common failure is sending the hammer through a forest or up a steep hill. Cavalry charge bonus is nullified on rough terrain, and a katana cavalry unit that has to cross dense forest to reach the flank arrives as a walking melee unit. Always route cavalry through open ground, and always reserve forest tiles for anvil or defensive yari screens.
Shogun 2 How to Use Archers: Positioning the Exploit Phase
Archers in SHOGUN 2 do most of their damage in the first ten seconds of any engagement, which is the window between the volley opening and the unit having to either retreat or be charged. Shogun 2 ranged units tactics come down to controlling that ten-second window, and the cheapest way to control it is positioning on a rise. Archers on a hill tile get an elevation bonus that adds roughly 25 percent missile damage and extends their effective range, which is the basic Shogun 2 elevation bonus at work.
The other half of archer play is making sure they are not the target of the enemy hammer. A bow samurai unit sitting in flat open ground with no screen in front of it is a free 200 gold for the enemy cavalry, and one of the most common Legendary-campaign losses is the entire missile corps deleting itself in the first ninety seconds because the player forgot to leave yari between the archers and the front line. According to the Konglomerat beginner battle guide on YouTube, the recommended baseline is one yari screen unit for every two archer units, and that ratio holds up across most army compositions.
Elevation, Range, and the Over-the-Shoulder Shot
The elevation bonus in this game is geometry, not magic. A bow unit on a hill tile gets a higher firing arc, which means the arrows come down at a steeper angle, which means fewer of them hit the friendly unit standing in front of the target. This is the single biggest reason experienced players obsess over hill tiles: a yumi ashigaru unit on a rise behind a yari ashigaru line can fire over the anvil and into the engaged enemy without friendly-fire incidents, while the same yumi unit in flat ground will hit the anvil roughly once every four volleys.
The other underused mechanic is the over-the-shoulder shot, where an archer unit placed directly behind a friendly melee unit gets a partial damage and accuracy bonus because the line of sight is unobstructed. It is not as strong as the elevation bonus, but it stacks with it, so the gold-standard archer position is "behind the anvil, on a hill, with a yari screen in front of the hill." That setup gives roughly 1.4x the missile damage of the same unit in flat ground, with zero friendly fire.
Archer Unit Comparison
| Unit | Range Tier | Accuracy Tier | Best Use | Notable Weakness |
|---|---|---|---|---|
| Yumi Ashigaru | Mid | Mid | Cheap line archers | Fragile in melee |
| Bow Samurai | High | High | Long-range trading, sniping | Expensive upkeep |
| Fire Arrow Naginata | Mid | High | Breaking morale, burning formations | Friendly fire risk on friendlies in line |
| Bow Monks | Mid | Mid | Early campaign, low upkeep | Slow to recruit, limited availability |
Fire arrow units deserve a special callout. The morale damage from a fire volley onto an engaged unit is roughly double the morale damage of a regular volley, and a yari ashigaru unit hit by fire arrows while already in melee will break about 30 percent faster than it would from a regular arrow volley. The trade-off is accuracy: fire arrows spread wider, so on a hill tile the difference is smaller, and in flat ground you will hit friendlies. Use fire arrows on the engaged unit, never on the flanking one, because the flanking unit is supposed to survive the contact and route the target.
Shogun 2 Terrain Advantage Guide: Reading the Map Before Deployment
A flank only works if the map gives you room to set it up, and the Shogun 2 terrain advantage guide is basically a checklist of map features that change the math. Hills add missile damage and slow cavalry charges. Forests block missile fire and break cavalry charges entirely. Rivers stop everything. Villages give a small morale bonus to defenders. Each of these features either helps your hammer, helps your anvil, or helps your exploit phase, and reading which is which before the deployment phase is what separates a real strategy from a default line battle.
According to the Viking General Legendary battle guide, the single biggest Legendary-specific trick is deployment. On Legendary, the AI gets a free morale and accuracy bonus that roughly mirrors the player's difficulty handicap, so the only way to neutralize it is to start the battle on a piece of ground that gives you a larger advantage than the AI's free bonus. A hill tile with forest on one flank and a river on the other is the cleanest example: the forest blocks the AI's cavalry, the river blocks the AI's infantry, and the hill gives your archers a 25 percent damage boost that is large enough to cancel out the AI's accuracy bonus.
Map Features and Their Effects
| Feature | Effect on Your Army | Effect on Enemy Army | Best Use |
|---|---|---|---|
| Hill | +25% missile damage, extended range, slower melee | Same penalty when attacker | Archer position, defensive line |
| Forest | Slows cavalry, blocks missile | Same penalty | Anvil position, blocking charges |
| River | Stops all movement | Stops all movement | Hard defensive line, siege anchor |
| Village | +Morale for defender | Same penalty | Hold village with one unit, anchor line |
| Bridge | Chokepoint, slows attackers | Same penalty | Single-unit defense, ambush spot |
Villages are an underused feature. A single yari ashigaru unit garrisoned in a village gets a morale bonus that makes it almost impossible to break with a frontal charge, which turns a 600-gold unit into a roughly 1200-gold unit's worth of holding power. A common Legendary tactic is to anchor a line on a village at one end and a hill at the other, then hammer the enemy from the open flank in the middle.
Defensive Terrain and Castle Battles
Defending a castle follows the same logic, with the added complication of multi-stage walls. The Shogun 2 how to defend a castle guide covers the wall stage in detail, but the field stage is essentially a terrain battle played on a smaller map. The outer wall stage is the easiest place to set up a hammer-and-anvil because the choke points at the gates funnel the attacking army into a single arc, and a single katana cavalry unit waiting behind the gate can hit the flank of the gate stack as it pushes through.
The archers on the walls get the elevation bonus for free, which means defending armies usually win the missile trade at this stage, and the common attacker mistake is committing to a frontal wall assault without leaving a reserve to handle the defending army's hammer. For deeper coverage of castle-specific micro, the Viking General castle defense guide walks through eight defensive patterns that work on Legendary, and the same gate-and-reserve logic translates cleanly to Total War if you want to see how to actually stall a rushing cavalry line in our Shogun 2 Castle Defence Tactics breakdown.
Turning Flanking Reads Into a Battle Routine
A repeatable battle plan is the difference between a guide you read once and a guide you actually use. The plan below is a six-step sequence that works on most open-field battles and scales up or down with army size. It assumes roughly 12 to 16 units, which is the most common stack size once the campaign has moved past the opening turns.
| Step | Action | Time Budget | What to Watch For |
|---|---|---|---|
| 1 | Deploy yari anvil in close formation across the center | Pre-battle | Make sure flanks are anchored on terrain |
| 2 | Deploy archers on a rise behind the anvil | Pre-battle | Confirm LoS over the anvil, no friendly fire |
| 3 | Position katana cavalry behind the line, 40+ lengths back | Pre-battle | Clear path through gaps in the anvil |
| 4 | Hold fire until enemy is in melee with the anvil | First 30 seconds | Don't trigger enemy cavalry counter-charge |
| 5 | Fire arrow volley on the engaged enemy unit | 30-60 seconds in | Watch for routing, swap to regular arrows |
| 6 | Order cavalry through the gap at 45 degrees | 60-90 seconds in | Hammer should hit during the fire volley |
The most important step is the fifth one. The fire arrow volley and the cavalry charge need to land within roughly five seconds of each other, because that is the window where the enemy unit is taking morale damage from missiles and shock damage from cavalry at the same time. A unit taking both at once breaks about 50 percent faster than a unit taking them in sequence, which is enough to convert a marginal flank into a route.
Adapting the Plan to Different Enemy Compositions
The plan above assumes the enemy is bringing a balanced army, which is the most common case in mid-campaign battles. Against an enemy army with a lot of bow samurai, the plan needs to flip: the anvil is now the cavalry hiding behind a forest, and the hammer is the yari ashigaru charging through it. The reason is that a yari ashigaru charge into the flank of bow samurai is a one-shot morale delete, while a katana cavalry charge into bow samurai is a fast-but-not-instant route that gives the bow unit time to fire one last volley on the way out.
Against an enemy with a lot of naginata samurai, the plan needs a third modification: skip the cavalry hammer and use a second yari ashigaru block as the hammer. Naginata samurai delete cavalry on contact, and a katana cavalry unit charging into a naginata corner will lose the trade roughly 80 percent of the time. Yari ashigaru into naginata flank is a much closer fight, and the difference in cost means the trade is worth it even if you lose the hammer unit.
The other high-frequency composition is an all-monk army, which is most common early in the campaign when the AI is still building up its recruitment. Monk units are very strong in melee but they have low missile defense, so the plan above actually works without modification: pin with yari, hammer with cavalry, exploit with archers. The only change is to fire arrows on the monks during the pin phase, because a single fire volley is usually enough to break them on its own.
Frequently Asked Questions
What is the easiest way to start a flanking maneuver in Shogun 2?
Deploy your yari ashigaru in a checkerboard pattern with a four-unit gap on one flank, position your katana cavalry 40 lengths behind that gap, and wait for the enemy line to engage your center. Once the enemy is pinned, attack-move the cavalry through the gap at a 45-degree angle into the engaged unit's side arc. This is the simplest version of the hammer and anvil pattern.
Do archers really need a hill in Shogun 2?
Yes, because the elevation bonus adds roughly 25 percent missile damage and removes most friendly-fire incidents when firing over a melee line. Bow samurai on a hill behind a yari anvil will outperform the same unit in flat ground by a clear margin, even with identical unit quality and general auras. The hill is the single most cost-effective terrain feature in the game.
How do I stop the AI from flanking my own hammer?
Leave a single naginata samurai or yari ashigaru unit parked in the center-rear before the cavalry moves out. When the AI commits its counter-flank, redeploy that reserve unit to intercept. A naginata samurai unit deletes light cavalry in roughly two swings, which is faster than a katana cavalry unit can route its target, so the reserve will usually arrive in time.
Can a hammer-and-anvil work with no cavalry at all?
Yes, but it requires a second yari ashigaru block acting as the hammer. Pin with one yari block in close formation, then charge the second yari block into the enemy's flank once the pin is established. The trade is roughly even against most units, so it works best when the army is built around yari ashigaru spam, which is the cheapest possible composition.
What unit should I prioritize upgrading first for flanking battles?
Katana cavalry, because the upgrade path adds melee attack and charge bonus that scale the shock damage. Bow samurai is the second priority because the accuracy and range upgrades make the fire-arrow volley phase more reliable. Yari ashigaru upgrades matter less for the hammer-and-anvil pattern, because the pin only needs to hold for 30 to 60 seconds and the base unit is already strong enough for that role.